
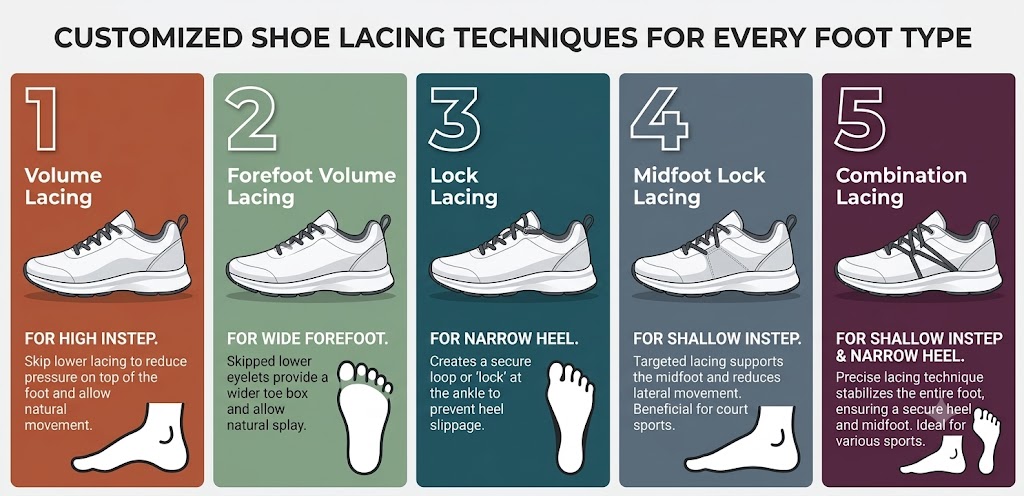
1. The Runner’s Loop (The Heel Lock)
Best for: Eliminating heel slippage and preventing blisters.
If you find your heel rubbing up and down inside the boot when you accelerate, this is the absolute best method to lock your foot into the soleplate.
1.Lace Normally to the Top:
Criss-cross your laces as you normally would until you reach the second-to-last eyelet on both sides.
2.Create the Loops:
Instead of crossing over, take the left lace and thread it directly into the top left eyelet on the same side, leaving a small loop. Do the exact same on the right side.
3.Cross and Thread:
Take the end of the left lace and thread it horizontally across the tongue and through the right loop. Take the right lace and thread it through the left loop.
4.Pull Down and Tie:
Pull the laces tightly downwards toward the sole of the boot to lock the loops tight against the ankle, then tie your standard knot.
2. The Soleplate Wrap
Best for: Maximum mid-foot compression and a traditional locked-in feel.
This is a classic technique favoured by players wearing leather heritage boots (like the Copa Mundial) or boots with fold-over tongues. It provides immense security around the arch of the foot.
How to do it:
- Lace your boots completely to the top eyelets using a standard criss-cross.
- Pull the remaining laces tight and wrap them completely underneath the arch of the boot (the soleplate) before bringing them back up to the top.
- Tie your knot securely over the tongue.
Note on Lace Length: Wrapping under the soleplate requires significantly more material. If you use this method, you will almost certainly need to upgrade to a 137 cm – 140 cm lace, regardless of how many eyelets your boots have.
3. The Wide Foot Bar (Straight Lacing)
Best for: Players with wider feet or high insteps experiencing pressure pain on the top of the foot.
If standard criss-cross lacing leaves your feet feeling bruised or overly compressed across the bridge, straight lacing relieves that downward pressure while keeping the boot secure.
How to do it:
- Run the lace straight across the bottom two eyelets (from the outside in).
- Take the left lace and run it straight up the inside to the next eyelet, then straight across to the right side.
- Take the right lace, skip an eyelet, run it straight up the inside to the third eyelet, and straight across to the left.
- Continue this alternating “ladder” pattern to the top. This removes the diagonal crosses that press down into the nerves on the top of the foot.